Showing posts with label My Pink Stamper. Show all posts

Saturday, August 30, 2014

Apple Of My Eye

Hello there crafty friends! Hope everyone is enjoying what's left of summer. It has been very hot here in SoCal! My kids have just finished their second week of school. This coming week there will be "Back to School Nights" and the week after progress reports.  I want to make some mini cards to give my kids throughout the school year. Here is the first one I made.


This is the apple card from the Wild Card 2 cartridge. I altered it quite a bit. I cut it out at 5.5".  It comes with a branch and bushy leaves attached. I trimmed that off. I cut the envelope out at 4.0" since I trimmed the card. I added another set of glasses and smile to the outer flap too.


Next I changed the frowny face to a smily face. I just love these little glasses. I made this card for my son so no bling! I used a mini tag from My Creative Time Teeny Tag Greetings and stamped it with My Pink Stamper "Fruit and Veggie Puns". I added some twine and stamped the inside with a stamp from Pink By Designs "Our kids" set. 


To me this came out so much cuter than the picture in the book. I hope you like my card! I will participate in the following challenges: 


Thanks for visiting and I hope you have a blessed day!


Wednesday, August 6, 2014

Lady and the Tramp Anniversary Card


Hello my crafty friends and Happy Thursday to you! For today's project I have a card I made for my sweet husband. On August 1st we celebrated our 16th wedding anniversary! My how time just flies. It seems like yesterday that we were starving students building a dream. We were both in college, me finishing my undergrad degree and he in his 2nd year at UC Davis Veterinary School of Medicine.  Our wedding theme as unusual as it may seem was Lady & the Tramp. We had a very unconventional wedding. It was outside in beautiful Malibu, California, on my cousin's ranch. My dog even walked with me up the aisle, lol (it was not planned, it just happened).  And now 16 wonderful years later, some things haven't changed... we are happy and blessed and I still have a sheltie at my heels :)
Here is my card...

I got this svg from SVG Cutting Files "Couples Blog Hop". It was my first blog hop and I was blown away with how amazing these SVG's that Ann makes are. Those ladies on the DT are amazing and in a class all their own when it comes to crafting. Needless to say I knew I would be using this particular cut! 


Now, keep in mind I am pretty new to the SVG world and I still cut them on my Cricut with the SCAL2. This SVG was very challenging for me but I think I pulled it off! I fussed with it a lot to get it the way I wanted and even added a few layers that were not in the original SVG. I used Valentine patterned card stock  from Recollections to really play on the "love" theme. The hearts and sentiment layers were cut from my Art Philosophy Cartridge. I used a few sentiment stamps and wrote the Lady and the Tramp by hand. I wish I had nicer writing!! The stamps are from Craftin Desert Divas, Docerela Stamps and My Pink Stamper. Of course, I needed to add some bling so I used some red heart shaped rhinestones.


My hubbie loved his card and we had a wonderful Anniversary weekend away in Las Vegas! Here are a few pics from our wedding. My sister decorated these figurines for our cake. I keep them in my curio.

Our wedding cake toppers!


My Sheltie Sunny was next to us as we said our vows!


Thanks for stopping in and visiting!

 I will participate in the following challenges:

Hope you have a blessed day :)


Monday, July 28, 2014

Sympathy Card using Paper Pups


Hello my crafty friends! I am so excited to be a Guest Diva for Die Cuttin' Diva's, one of my favorite blogs!! With such a talented and inspirational Design Team I feel honored to be a part of this weeks challenge. The theme is Anything Goes and I am sharing a card I made for a dear friend. She just lost her dog to cancer and of course it has been a rough time for her and her family. I made her this card to try and cheer her up. 


This pup is from my Paper Pups cartridge and I cut him at 4.0".  Her dog was a big cutie and looked very similar to this one. I used some black pearls for his eyes and glossy accents for his nose. I added the red tongue instead of leaving it brown.  The papers are from the DCWV Pet Stack. I cut the shaped card using my Art Philosophy cartridge at 5.25".  


I used 2 different stamp sets for the sentiments.  "Always in our hearts" is from My Pink Stamper and the inside sentiment is from My Creative Time Stamps.  I fussy cut some hearts and added them to the front and inside.


Be sure to checkout all the fabulous projects made by the DT team and link up your own project to the Die Cuttin Diva's Challenge Blog!

I will participate in the following challenges:

Thanks for visiting and have a blessed day!


Wednesday, May 21, 2014

It's Your bird-day- Imagine Lori's Garden

Good morning my crafty friends! Today I am posting another card I made with my papers from my Imagine Lori's Garden cartridge. I just love this cartridge so much, especially this birdcage paper.


 I used a pink cardstock for the A2 size card and layered it with white cardstock.  I inked the layers with Tim Holtz Tea Dye Distress Ink.  The pinks and blues are just so pretty together. I printed and cut the bird and banner, and added layers to the bird. It needed a sparkle so I used baby blue Stickles. 


The scalloped oval was cut from my Imagine stock images. I just love the script paper.  I thought the printed flowers didn't stand out as well as I liked so I added some pink, ivory, and blue prima flowers and centered them with pearls. The decorative crochet ribbon added the perfect border. 


I added layers to the inside and didn't stamp a sentiment just yet since this card is for my stock. Yes, I actually have a couple cards in my stock now, lol! Last but not least I added the pastel buttons. I thought about pearls but they got lost in the paper so I decided to go with the cute buttons. 


I hope you like my card. I am so happy with how it turned out. It is kinda fun just playing with a set of materials and trying to make something of it without any kind of plan. I usually start a card with a vision of something in mind but this card was made using what I had in front of me at the moment. I am trying to use up what I have instead of throwing it in my scrap box (which is getting quite full!!)

I will participate in the following challenges:

Thanks for stopping by! Have a wonderful day :)


Friday, May 9, 2014

Teddy Bear Garden- Mother's Day Card In a Box

Hello to you my crafty friends! Thanks for visiting my blog today. I made a Mother's day Card in a Box for my dear mom. My mom loves teddy bears and roses. So when I thought of what I would make for her I came up with this! I am so happy with how it turned out.  It may just be my favorite Card in a Box so far. I craft with critters and I usually don't do many floral designs but I really wanted to make one of these cards with the flowers bursting out like what you see on Pinterest. But I had to have my critter in there somewhere too, sooooo......Here it is!


I've had my eye on this little bear from the Cricut Create a Critter 2 cartridge and thought she would be just perfect. For the flowers I wanted lots of detail so I thought I better dust off my Imagine. I pulled out my Lori's Garden Cartridge and went to work. This cartridge has the most beautiful designs. I wish Provo Craft would have stuck it out with this machine because it is quite fabulous when it works like it should. I guess I'm lucky because it has worked just fine for me.


 I used Cream cardstock and cut my box card. I used this beautiful glittery damask DCWV Cardstock for all the layers both interior and exterior. I added a pale pink ribbon to the outside. All the rest of the design was printed and cut with my Imagine machine including the bear and hat. I love how easy it is to coordinate colors with my Imagine.  


I layered a couple small Prima flowers with a rhinestone brad to add bling to her hat. I used pearls to make her a necklace and add dimension to her eyes. I chalked her cheeks and used Glossy Accents on her little nose. The stamp is from My Pink Stamper- Happiest Moments. I wish the colors and papers showed up as vibrant and glittery in these pics as they are in person. Isn't she cute! She looks so happy in the garden with the butterflies flying about. I hope my Mom enjoys her card as much as I enjoyed making it!


I will be participating in the following challenges:


Thanks so much for visiting. 

I wish you a very Happy Mother's Day!

 Tina H

The Scrappin Rabbit


Mother's Day Tea- Card in the Box

Hello Crafty Friends! Mother's Day Weekend is here and I have a card for the occasion. Of course it is another Card In A Box! I imagine everyone I make cards for will want one of these this year so I will be making plenty more. 
This card took me 5 Cricut Cartridges to make, lol! I had been thinking for a while that I wanted to do one with a window. The Creative Cards Cartridge has a great window so I used that one at 3.5". I cut the curtain layer out larger than the window (4.25") as it would look on the inside of the house. 


This particular card is for my husbands wonderful step-mom. She loves cats like me so I had the idea for a cat sitting in that window. I used cloud paper scraps to make it so the cat could be peering outside. The cat silhouette is from A Child's Year Cartridge. He is cut out at 1.75".  Being that the card would be the inside of the house I thought I would decorate it like a tabletop. It took a while to sort it out but this is what I came up with! The adorable teapot and cups are from the Love You A Latte Cartridge. I just love the lacy trim. There were no saucers so I just cut out ovals. I found the little cake from the Sweet Treats Cartridge and also the decorative tag. 


I embossed the white cardstock with my Cuttlebug Birds and Swirls folder and used a border punch to try to make it look like a tablecloth. I found the vase and flowers on the Everyday Pop Up Cards Cartridge and cut it at 2.5". I added pearls and bling to the flowers and cake. 


I wanted a simple look so I used the solid colored cardstock. I added an additional insert for the cups because I didn't like them flush to the front. I was tempted to add more but I am happy with how it turned out. I didn't ink anything this time trying to give it more of a fresh and clean look. 


I hope she likes it! This is the larger size Card In the Box so I took it to the Post Office, paid the extra postage, and sent it off. Here's the backside. The sentiments are from Fiskars- Latte Love, My Pink Stamper-Happiest Moments and Docerela Stamps- Lovable.


I hope you like my card. I sure had a great time making it! I will be participating in the following challenges:


Thanks for stopping by and have a Happy Mother's Day!

Tina H 

The Scrappin Rabbit


Thursday, April 24, 2014

Quilted Kitty Card

Hello my bloggy friends! Here is a second quilted pattern card I made using the same K&Co. paper scraps (I can't remember the name of the stack) from my Easter card. These scraps are leftover from a Girl Scout project we did a couple years ago. I am just amazed how far scraps can go using punches.  I hate to throw away craft supplies so I save any decent size scraps in my scrapbox.  I am working on a few others that I hope to get posted tomorrow. This paper is so bright and cheerful and perfect for Spring. I just finished this card so let me tell you what I did while it's fresh on my mind. I'm trying to get better about documenting everything I use, sizes, etc...it's so easy to forget!


My card is 4.25" x 5.5". First I punched out 1 1/4" squares using my Creative Memories square punch.  This time I glued the squares at a diagonal across a piece of scrap paper that was 5" x 3.75. I trimmed around the edges forming a quilt pattern. I then ran it through my Cuttlebug using one of the folders from the Oriental Weave set. Next I cut out the blue layer at 5.25" x 4".  I cut the kitties from the Cricut Kate's ABCs cartridge. I cut two at 1.5" and the other at 2". I used Tim Holtz (tea dye) Distress Ink and a Q-tip to shade in the kitties. I used some tiny brown enamel dots from Recollections for the eyes and doodled the nose and cheeks and lashes. The top note shape is from the Cricut Elegant Edges. I cut it out at 3 inches in the light blue cardstock and cut the shadow out in white. I inked everything with the Tea Dye distress ink to add dimension. 


I used 3 different stamp sets to form my sentiments. I handcut the banner and stamped the "wishing you " with Joy's Life- Everyday Occasions. I then used a fabulous set from Craftin Desert Divas called Summer Lovin' for "A day for play". This set has a ton of water themed sentiments that I hope to use soon. The Pawsitively Purrfect Birthday is from Joy's Life- Lots of Puns. The little cat paws are from a container of a dozen or so different animal footprint stamps I've had for years by Hero Arts and I finally just opened it up. I actually remembered to take a pic of the inside this time :)


I finished it up with some more of those pastel buttons that I just adore and some simple white ribbon. I just love how it turned out! I think I know exactly who to give this darling little kitty card to and she has a birthday coming up in July. Wow, a card done more than a month in advance, lol! 

I will be participating in the following challenge:


Thanks for stopping by and I hope you enjoyed my card!


Tina H.
The Scrappin Rabbit


Sunday, March 23, 2014

Teapot from Pagoda

Hello there! Today I have a simple card that I made with my mom. She is very crafty with sewing and ceramics and wanted to learn papercrafting to make a card for a coworker.  She wanted to give the Cricut and Cuttlebug a try and this is what we came up with. 


First we needed a teapot. My mom works at a Japanese restaurant and so we picked this pot from the Cricut Pagoda cartridge. She wanted a floral design so she chose this paper from my hoards. I fussy cut around the lid to give the different layers look.  


We chose the flower cuttlebug folder that came with my machine.  I showed her how do some inking for dimension.  She chose the sentiments from My Pink Stamper and we added a little ribbon.  To show her variation I taught her how to do an easle card


I cut out the inside layer and sentiment tag from my ever favorite Elegant Edges and added a fabric flower with rhinestone on the inside. We had a lot of fun crafting together and she really wants to play more in my craftroom! Maybe next week we'll do another project together.

We will participate in the following challenges:


Thanks for stopping by & have a great day!!

Tina

 The Scrappin Rabbit


Saturday, October 12, 2013

Cricut Enjoy the Seasons Fall Birthday Card


Today I made a card using just my Cricut Imagine machine and the Enjoy the Seasons cartridge. One of my good friends is having a birthday and I wanted to make her something Fall themed. I used brown cardstock for the card base and printed the rest of the paper with the Imagine. I cut the adorable squirrel and the leaves using the layer feature and finished off with a leaf brad and glitter glue. I rounded the corners and inked the edges of the paper.


I popped everything up using foam tape.


I decorated the inside with more layers and leaves and acorns. I used My Pink Stamper stamps for the inside sentiments. I enjoyed making this card and really should use my Imagine more. I have so many cartridges that I haven't even used yet. My goal is definitely to start using all my stuff!!


I am going to enter this card in the following challenges:
Bitten By The Bug 2 "Fall Leaves are Falling"
Die Cuttin Diva's "Use Brown"
Little Scrap Pieces "Fun Friday Linky Party"

Thanks for stopping by!


Friday, October 11, 2013

Halloween Chic & Scary Witch

I made this Halloween card using the Cricut Chic & Scary cartridge. I have been trying the pedestal card fold and like the way it turned out. I used purple cardstock and paper from DCWV "The Midnight Spell" stack. The stamps are from My Pink Stamper's "Spooky Puns".
 
 
I popped the witch and sentiment up with foam tape. I found the sparkly purple ribbon in the Fall craft section at Walmart for a dollar.  I added the shiny black buttons for that finishing touch. The papers look so much much better in person. I am so happy to be visiting blogs and crafting again. So much talent out there and I just love it! I am hoping to have time to do Halloween goody bags for the neighbors and carpool kids and to work on some Fall stuff too.

 
I am going to enter this in the following challenges:
Exploring Cricut challenge to use at least 1 button, brad or jewel
Craftin Desert Diva's "Anything with a sentiment"
 
Thanks for stopping by!

Friday, March 8, 2013

Penguin Birthday Card

I made my daughter a penguin Birthday card using the Cricut Create a Critter 2 cartridge. It was a very special birthday because she turned 13! I can't believe I am a mother to a teenager. I had so many plans but with our dog still lost we have been spending every spare moment looking for him. We will not give up but it has been such a sad and worrisome time. This card is very simple but she loves penguins and purple so at least I got that right!
 
I will enter this card in the Cardz Tv "Make a Wish" Challenge

Sunday, October 7, 2012

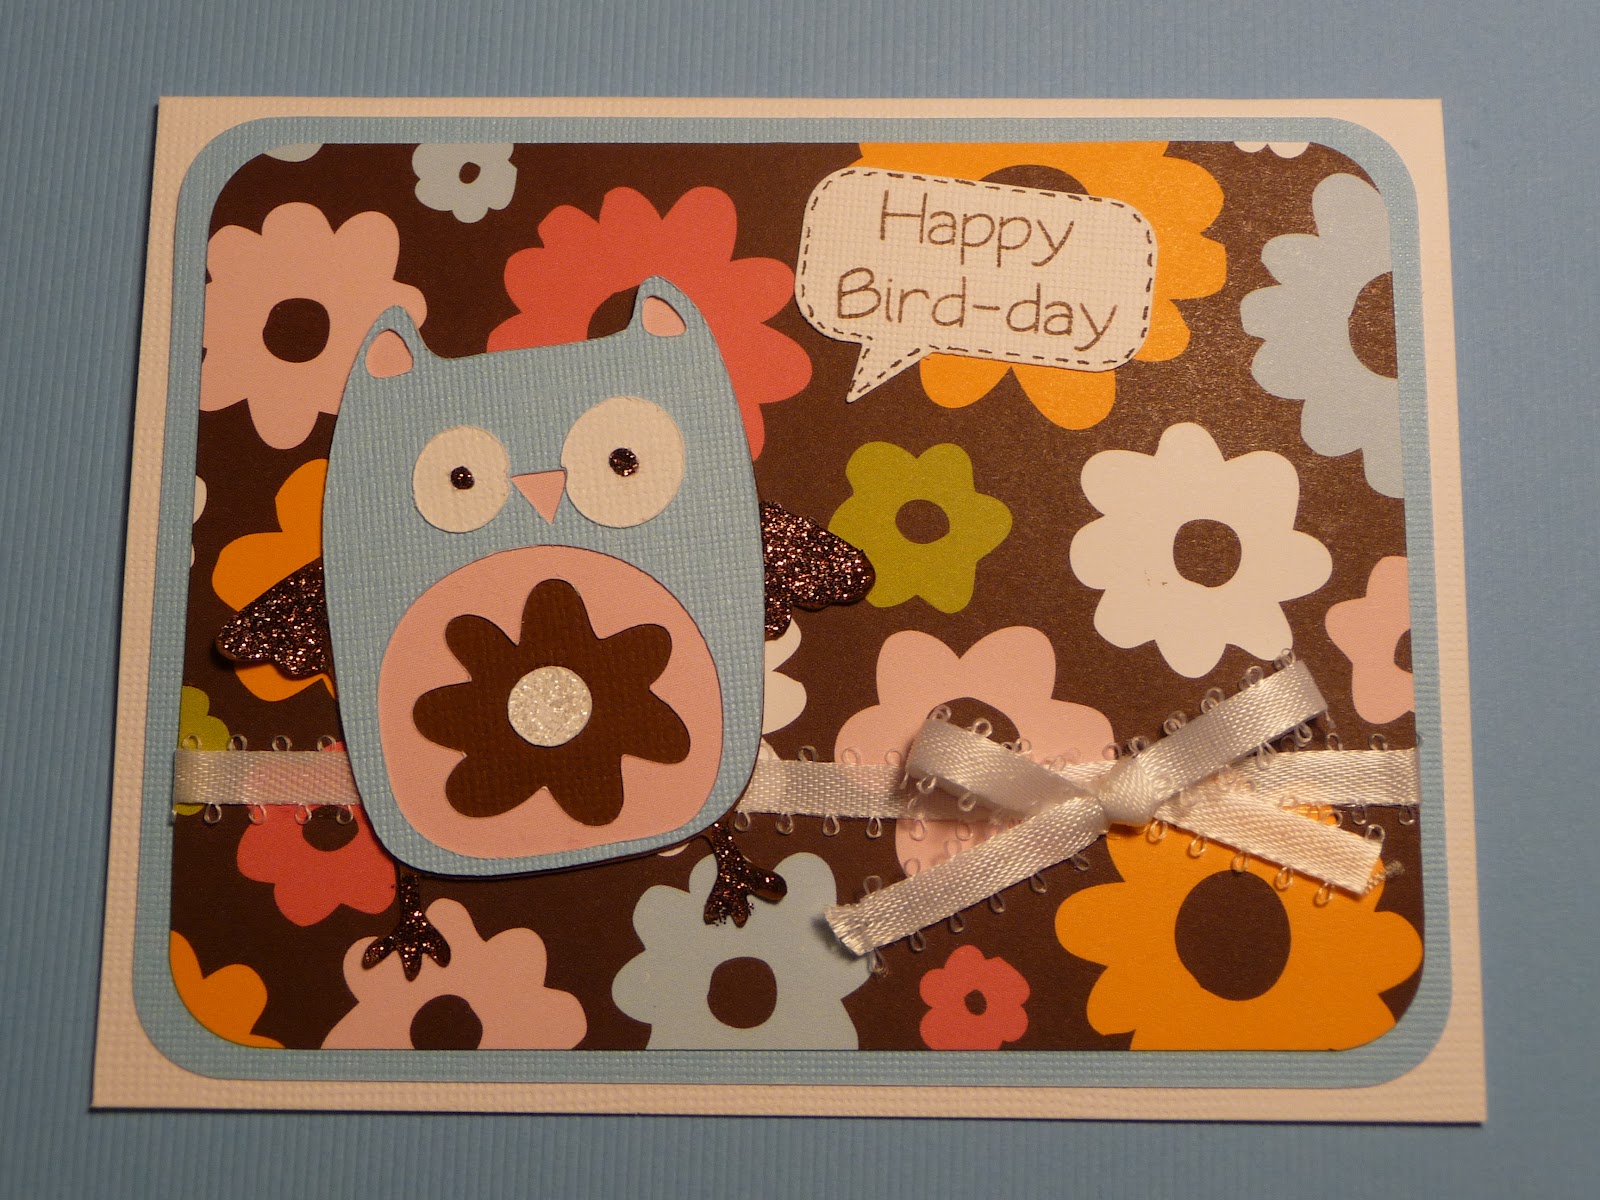
Cricut Hoot 'n' Holler Owl Cards

Here are some cards I made with a few of the Cricut Hoot 'n' Holler owls I made a couple weeks ago.


In the 1st card I used an EK Success punch for the word bubble, My Pink Stamper stamps for the sentiments, and stickles to make my owl sparkley. The 2nd card I used an EK Success border punch, My Pink Stamper stamp for the sentiment and both the butterfly and branch are from the Cricut Create a Critter cartridge. I also used Stickles and Glossy Accents.
 
I then made a Halloween Owl card. I used the Happy Hauntings cartridge for the cute little witch hat, the Cuttlebug Tiny Mosaic for the owl, Elegant Edges for the medallion and My Pink Stamper and Inkadinkado for the Sentiment.

 
Thanks for looking and have a great day!


Labels

Birthday (5) Birthday Projects (18) Card In A Box (11) Christmas (3) Christmas Projects (57) Coffee theme (2) Craftin Desert Diva's Stamps (157) Easel Card (3) Easter Projects (24) Fall Projects (17) Flip Book (4) Gerda Steiner Designs (2) Get Well Projects (1) Gina Marie Designs (14) Goody Bags (1) Graduation (4) Halloween (2) Halloween projects (30) Happy New Year (1) Harry Potter (4) Hello Bluebird Stamps (1) Hello Kitty (2) Hero Arts (2) Honey Bee Stamps (1) Jaded Blossom (429) Jessica Lynn Original (2) KaDoodle Bug Designs (2) Lawn Fawn (10) Loaded Envelope (1) Lori Whitlock (7) Love Cynthia Stamps (1) Mama Elephant Stamps (5) Masculine Projects (2) Memorydex - Rolodex (2) Mermaids (2) Mini Albums (1) Miss Kate Cuttables (1) Mother's Day (3) My Creative Time Stamps (24) My Favorite Things Stamps (1) My SVG's (5) My Scrap Chick (7) Newtons Nook (101) Planner (14) Pocket Letter (8) Pooh and Friends (5) Pretty Paper Pretty Ribbons (2) Pretty Pink Posh (3) Rilakkuma (1) SVG Cut Club (39) SVG Cuts (2) SVG Cutting Files (85) SVG Made By Me (2) Shaker Cards (28) Shaped Card (1) Sister Stamps (1) Slimline Cards (11) Spellbinders (20) St.Patrick's Day (4) Stamp Anniething (156) Stampendous (1) Star Wars (2) Swap (1) Thank You (1) The Dreaming Tree (1) The Rabbit Hole Designs (4) Tim Holtz (1) Tina's Cute Critter Challenge (2) Valentine's Day Projects (35) Waffle Flower (1) We R Memory Keepers (1) Wedding Projects (2) Winter Projects (4) You Tube Video Tutorial (227) Your Next Stamp (2)